Every year we get calls from Long Island homeowners who need their bathroom torn apart and redone — not because the tile looks old, but because water got behind the tile and destroyed the wall. Sometimes the bathroom is only a few years old. The problem is almost always the same: whoever built it skipped proper waterproofing, or did not know how to do it correctly. This is one of the most important things to understand about any bathroom remodel, so let's go through exactly what should happen and what to watch out for.
The Core Misunderstanding: Tile Is Not Waterproof
Most homeowners assume the tile in a shower keeps water out. It does not — not by itself. Ceramic and porcelain tile are water-resistant, but they are not waterproof. Grout is even less so. Over time, water migrates through grout lines and tile joints. What stops it from reaching the framing and subfloor is the layer behind the tile: the substrate and the waterproofing membrane.
If those layers are done correctly, your shower can function for decades without a problem. If they are done poorly — or skipped — you are looking at mold growth in the walls, rotted framing, damaged subfloors, and eventually a complete gut-and-redo that costs far more than getting it right the first time.
Step One: The Right Substrate
Standard drywall — even moisture-resistant "green board" — is not an appropriate substrate for a shower or tub surround. It absorbs water. In a wet environment, it fails.
The correct substrate for a tiled shower is either cement board (such as HardieBacker or Durock) or a foam-based waterproof panel (such as Wedi or Schluter Kerdi-Board). These materials do not absorb water, do not rot, and provide a stable surface for tile adhesion.
Cement board is the most common and cost-effective choice. It needs to be installed with proper fasteners at the right spacing, and every seam and corner needs to be taped with alkali-resistant mesh tape before the waterproofing membrane goes on. If your contractor installs cement board and immediately starts tiling without addressing seams and corners, that is a problem.
Step Two: The Waterproofing Membrane
The membrane is what actually creates the waterproof barrier. There are two main types used in residential bathrooms:
- Liquid-applied membranes: These are brushed or rolled onto the substrate, similar to paint, and cure to form a continuous waterproof layer. Common products include RedGard and similar elastomeric coatings. They are easy to work into corners and irregular surfaces and are widely used by experienced tile setters.
- Sheet membranes: These are fabric or foam-backed sheets that are bonded to the substrate with thin-set mortar. Schluter Kerdi is the most well-known example. Sheet membranes can be slightly more forgiving to inspect — you can see if there are gaps or unbonded areas — and they integrate cleanly with drain assemblies designed for the same system.
Both methods work when installed correctly. The critical areas are the corners — where the floor meets the wall and where two walls meet — and any penetrations through the membrane (drain, valve, fixture body). These are the spots where failures begin. Corners should be reinforced with membrane fabric or pre-formed corner pieces. Every penetration needs to be sealed and integrated into the membrane system.
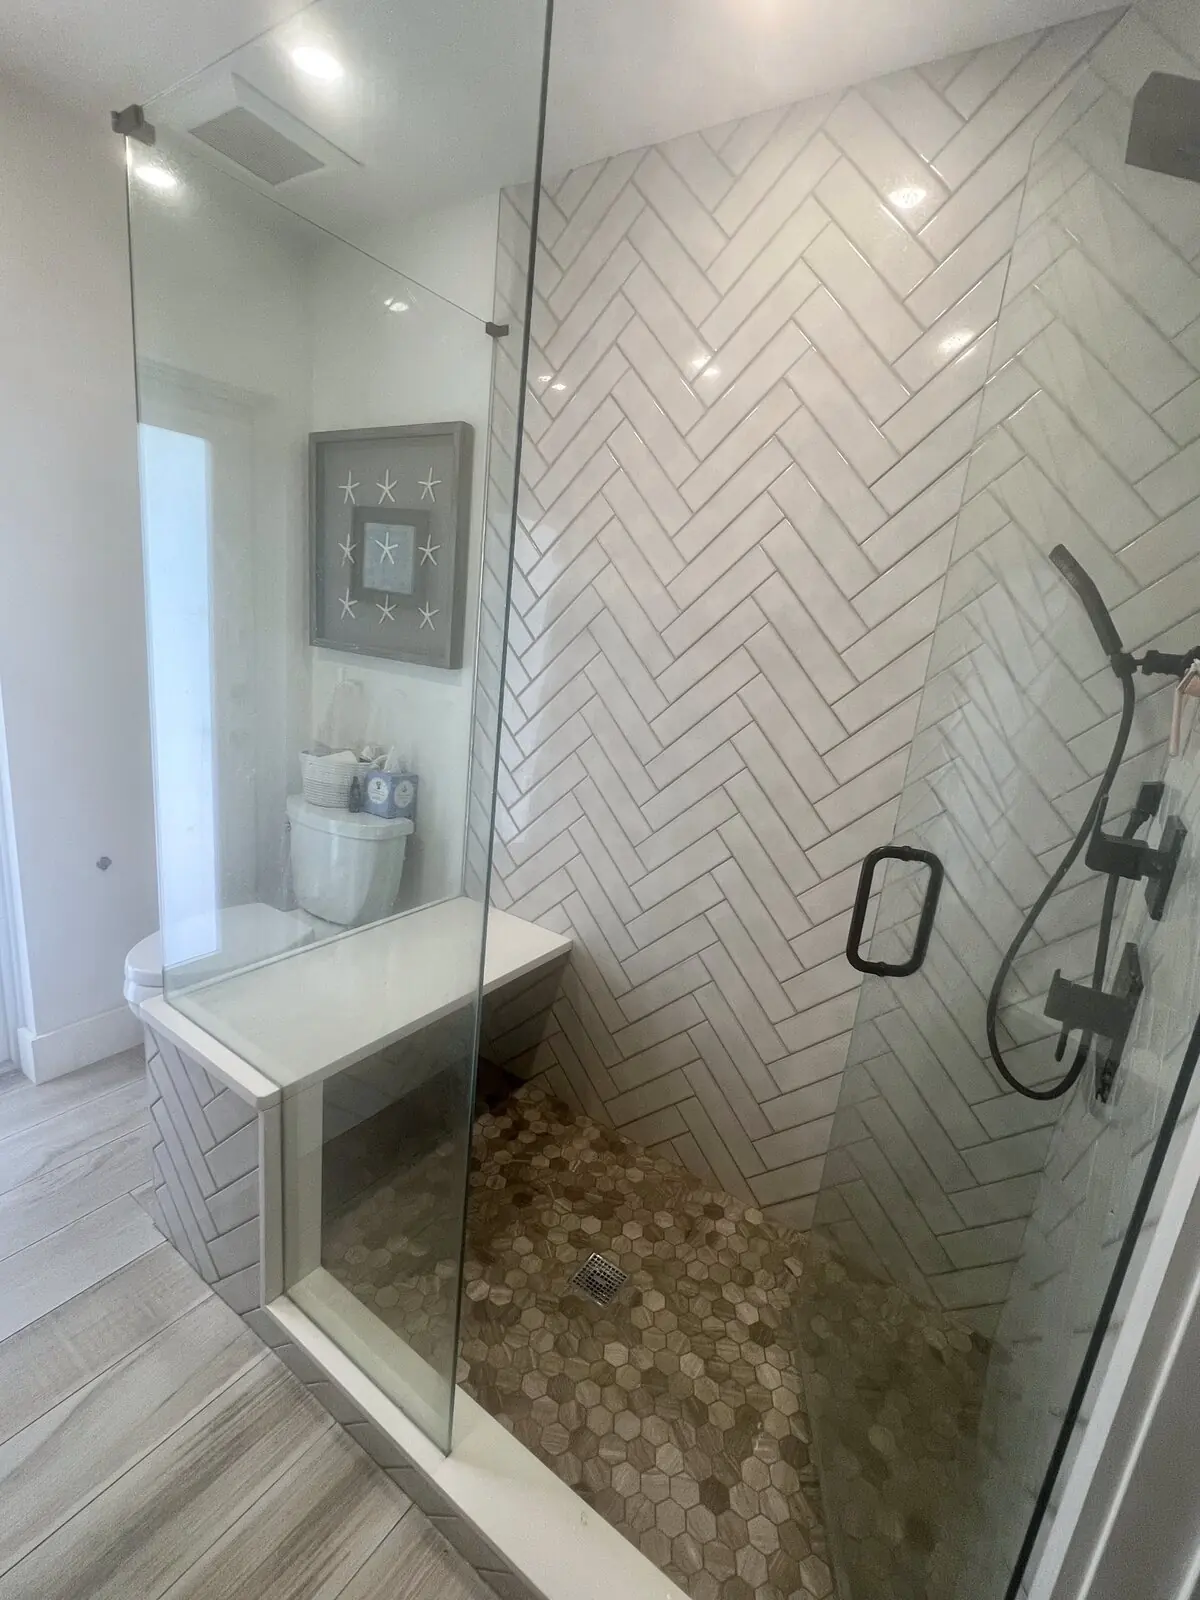
Step Three: The Shower Pan and Drain
The shower floor is the most water-intensive surface in the room and the most common source of failures. There are two main approaches:
Traditional mud-bed pan: A layer of mortar is floated over the subfloor, sloped toward the drain at a minimum of one quarter inch per foot. A liner — typically PVC or CPE sheet — is embedded in the mud bed and clamped at the drain. A second layer of mortar goes on top, and tile is set on that. This is a time-tested method that requires skill to execute but produces a very durable result when done right.
Prefabricated foam shower pan: Products like Schluter Kerdi-Shower or similar pre-sloped foam trays are bonded to the subfloor and covered with the sheet or liquid membrane system. These are faster to install and eliminate some of the variables of mud-bed work. They pair well with linear drains, which many homeowners prefer aesthetically.
What is not acceptable is tiling directly over a plywood subfloor with no pan, no slope, and no liner. We have seen this. It fails, always.
Niches, Benches, and Other Penetrations
Built-in niches and benches are popular, and there is nothing wrong with them — but they are additional points where waterproofing can fail if the contractor is not paying attention. A niche cut into a wall requires waterproofing on all five interior surfaces, with special attention to the floor of the niche, which should slope slightly toward the front to drain. A bench needs the same treatment. Pre-formed foam niche inserts eliminate most of the risk because they are already waterproof; site-built niches made of cement board require careful membrane work.
Red Flags to Watch For
- A contractor who does not mention waterproofing when scoping the job
- Use of standard drywall or green board in the shower area
- Cement board installed without seam tape or corner treatment
- No visible membrane product on the job site
- Tile being set directly after cement board with no curing time for liquid membranes
- A price that seems too low to include the correct materials and labor
- Rushing through the substrate and waterproofing stages to get to tile
A properly waterproofed bathroom costs more in materials and labor than a poorly done one. That difference is not waste — it is the cost of a bathroom that works correctly for twenty or thirty years instead of one that needs to be torn out in five.
How We Do It at Milton's Construction
On every bathroom remodel we do on Long Island, waterproofing is treated as a separate and critical phase — not something that happens incidentally while prepping for tile. We use the appropriate substrate for the application, apply membrane to all wet areas with reinforced corners and sealed penetrations, and make sure the shower pan is properly sloped and lined before anything goes on top of it. We do not rush these steps because we know what happens when they are skipped.
If you are planning a bathroom remodel and want to make sure it is done right the first time, we are glad to talk through the details. Reach out through our contact page or call and text us at 631-741-0199 to schedule a free written estimate. We will take a look at your space and walk you through exactly what the job involves.

Founder of Milton's Construction. Four decades building and remodeling homes across Long Island. More about us →